How to replace outside door handle on Chevy Express van would be a hassle if you don’t have the proper technical grasp.
Using a car or Chevy Express van for a little while means you do not give much attention to the door handle. You operate it a few times. The driver’s door handle lasts longer.
However, sometimes the front passenger door or the rear door handles can trouble you, thereby causing plenty of frustration.
Instead, there are ways to fix the issue if you know how to complete the operation. The handles may be of cheap cast metal or of plastic that it will crack eventually and snap off.
Table of Contents
How To Replace Outside Door Handle On Chevy Express Van
The handle replacing procedure varies with each car. It needs dismantling of the door interior but can be changed easily from the outside following a few steps.
Materials Needed
- Philips screwdriver
- Torx bit set
- Painter’s tape
- Door handle replacement
- (1/4 drive ) Socket wrench set
Step 1: Buy a new handle
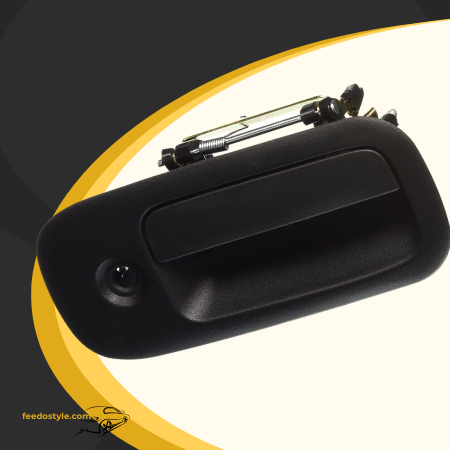
It is a must to understand how to replace the outside door handle on the Chevy Express van. It helps to know about the handle and to get an insight into the way it will be attached.
A car with an automatic door lock may feature small levers to be connected or come with electrical connections, in case the car has a security system.
Check the fasteners installed and determine if they may be removed from the door exterior. If not, it is essential to work from the door inside.
Confirm with a professional if the handle will feature a lock cylinder. Do you want a separate key for this door or the old key will fit.
Nevertheless, you can order the cylinder to the existing key serial number.
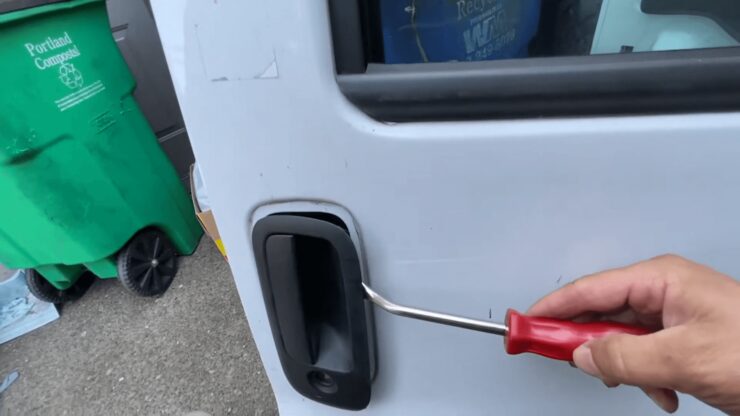
Step 2: Identify fasteners
A fastener is located around the door handle corner. It is behind a plastic plug and easy to find.
The fastener will be in use and will bear a screw at the forward. On observing the handle replaced it will be clear that the fasteners are in place.
Step 3: Use painter’s tape
Apply painter’s tape a little around the handle. It will assist in finalizing the job without causing any scratching.
Use quality tape such that it is easily removable and the finish is protected. It is the right time to use your socket set, screwdriver, or Torx driver to remove the bolts out.
The handle is free to move front and back.
Step 4: Take off the door handle
First, slide the vehicle’s door handle. The front handle becomes free to move and can be slid out with ease.
At this point, you will come to know if any mechanisms need to be disconnected. If so, it will perhaps have some wires or plastic shaft or bar fastened to a mechanized door lock.
Mostly, it is popped using fingers.
Step 4: Switch out the lock cylinder
Switch out the lock cylinder. Put in the lock the key and remove the fastener from its place. It will have a clock spring attached.
So withdraw carefully the cylinder using the key and replace the new handle.
Warning: Never take off or detach the key as the lock stays in position. If you try, the springs and tiny parts will fly all over the room.
Step 5: Door handle installation
Use rubber gaskets first to slide into the slot, the small end of the door handle, and insert the large end.
Next, reconnect the electrical connections or links and guide them into the slot the handle. Now, you should get to see from the hole the mechanism that engages the handle.
It is essential to operate the trigger or the lock to get a latch to engage the mechanism during handle insertion.
Step 6: Fasteners Setting
Position in the door jamb the fastener and do not stiffen it tight. Ascertain the handle seating position is touching the door.
On the front, if there is a fastener, install and do not tighten it right now. Secondly, tighten the door jamb the fastener, and tighten other fasteners.
Try the door handle, check the lock, and test the alarm to ascertain everything is correctly hooked up. Once the job completes, pack the plastic plugs covering the holes.
Changing from outside the door handle is also correct, and many people do it.
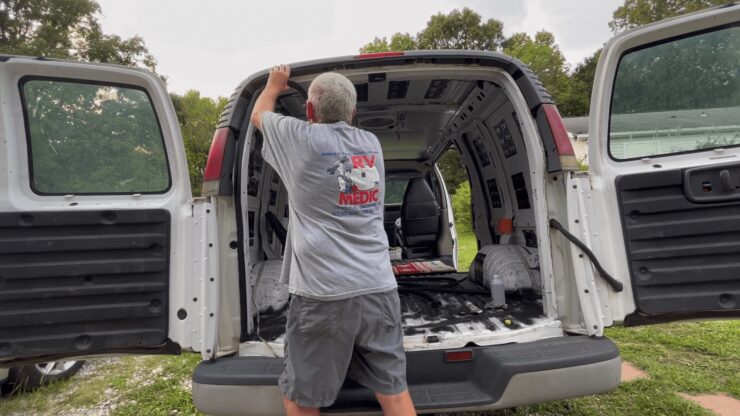
Sometimes your car door handle may require replacement from the inside that can be challenging even for expert mechanics.
Eventually, you may call your mechanic and stay stress-free from how to replace the door handle on Chevy Express Van.
Types of Chevy Express Van’s Rear Door Handles
- Chevrolet GMC Rear cargo door handle exterior.
- Chevy Express, GMC Savana Van rear door with black textured handle featuring w/license plat pocket-RR.
- Chevrolet GC Front & Rear 4 piece door handle set exterior.
- Chevrolet GMC front driver and hinged side passenger door 2 piece door handle set exterior.
- Chevy Express exterior rear door handle back door tex.
Chevy Express Van Rear Door Replacement Cost
The replacement procedure for the door handle may need removing the door or fixing it from outside. However, the costs include:
- A DIY job is to replace the interior door handle. If you know how to replace the outside door handle on Chevy express van and have the required tools, you can consider doing it all by yourself. However, the price of an average shop reputable mechanic will be from $50 to $200.
- The car door handles in plastic are at $30 – $50. The metal parts are at $32 to $830. Replacement of OE individual door handles ranges from $30 to $600 and set costs around $50 to $520.
- The average cost of materials to install a door handed ranges from $32.24 to $50.56. The labor and materials total price is $122.72, and it is from $70.91 to $174.53.
ChevyExpress Van Rear Door Parts
- Door Hinge upper- It includes body side and door, Hinges kit, R/D UPR, bolt, bracket, hinge, bar, and support for upper, lower, rear, and front.
- Insulator- It includes silencer, R/D lat rod, screw, bolt, bracket, support, and cover.
- Bolt- body moldings, side door lock, washer/wiper, capsule/headlamp, door lock, lift gate, fuel tank filler, seat belt, rearview mirror, and screw.
- Door Latch Assembly- (Lower, Rear) lock, latch Dutch doors, cargo doors, rear door hinged type mechanism to secure chassis to door, assembly cable, latch door lock, and headlight switch.
- Door, Nut, Handle left side nut securing interior door handle. Passenger side bezels lock strike, trim panel, pull and wedge interior and exterior.
- Passenger side door mirror, dual glass, riverside front door handle outer.
- Striker, Hinged rear door left side, and right side door lock, anchor, solenoid valve, retainer, wedge, door lock striker.
- Nut, door, door hinge, fuel tank mounting strap, door lock remote control. Heater, auxiliary speakers, roof trim, and rear quarter trim.
- Child security info, a label on the back glass, child lock information and operation, child security loc info, child security lock on the window, Glass child security, child lock, and Engine ticker.
There are rear door and handle parts available as aftermarket and OEM parts ranging in varying prices.
If you are keenly looking for a specific brand for your Chevy Express van, you can avail from popular brands.
Finding the right rear door and handle part type is best done by comparing various brands and going through the reviews. Read the customer experiences before arriving at a conclusion.
Remember you can order or place an order online for any of the doors and handle parts to get them shipped to your home directly.
If you want to buy in person, visit any of the nearest locations for your specific auto parts and examine them before buying.
Search for trusted brands, compare the prices, and ascertain you get the auto parts to keep your Chevy Express Van humming.
Important FAQs on Replacing Outside Door Handle On Chevy Express
Q: What can you do to replace a car door handle?
Replacing the door handle is a procedure and it varies with each vehicle.
Some may need dismantling of door interiors, while many may be replaced even from the door outside on following a few procedures
Q: Why is it not easy to replace a van or car door handle?
The car door handle replacing procedure is not the same process for all cars. It is time-consuming and is precise work to be handled with care.
Q: What is the possibility of gluing the car door handle back to its place?
Applying glue of high strength to the door plate screws and backing plate is a way of receiving further resistance to the wear and tear of every day.
All you have to do is unscrew, wipe the dirt or dust and apply glue as a thin bead around each screw before you screw them back into place.
Q: What is 4 and 5 doors cars?
The difference is simple. 5 doors car has the trunk or boot opening from the back glass top and the 4 doors open from the same glass bottom.
Q: What will you do to open a door when the latch gets broken?
Use a screwdriver and push the doorknob to the opposite side from the latch and the door. Pull from the latch center the spindle.
Thread through a large spindle hole the screwdriver within the latch. Finally, pull away the screwdriver to enable retracting the latch and free it from the latch hold.
Q: What is the solution when your car door fails to open?
The solution to fix the car door failing to open is to try these:
- Install a new lock or use a new key.
- Lubricate the lock in case it is found sticking.
- Get locksmith.
- Check and try if the latch is malfunctioning or broken
- Examine the door panel for any concern after taking it off.
Q: What is to be done to fix a broken door handle that does not open?
Removing the lock and handle from the door and testing the mechanism involves:
- Taking off the handle from the door.
- Use the thru spindle and remove
- Place a screwdriver in the place you removed the spindle from in the gap.
- Twist the screwdriver and engage properly in the mechanism.
Q: What is the reason for a car door to not open?
In many cases, a single door does not open, and the reason is a broken latch. It requires replacement. If you manage to get into the vehicle, it is acceptable.
This way, you can get home safely, contact a mechanic and resolve the issue by making the right repairs.
Q: Why do actuators fail?
The actuator in the door lock fails over time with regular use. The motor fails or can go bad the same as other parts in a car.
It can go bad such that it will not unlock your vehicle. It may get stuck with one or all the doors, besides it may work at times and not always.
Q: What happens when a door lock actuator turns substandard?
The door lock actuator turning substandard or goes bad means to consider disabling the power door lock feature. It will need the driver to use the lock and key or to unlock the doors.
It also allows to disable completely the power door locks and most vehicles that are new do not have a traditional key.
Q: What is the time taken to replace a door lock actuator?
The replacement work does not take more than one to two hours and it includes testing.
A failing or bad power door lock actuator produces some symptoms notifying the issue to undergo service.
Read Also: How to Replace Door Hinges on Chevy Silverado?
Verdict
Exterior door handles fail with regular use. They need replacement if they stay locked or become loose.
It means having enough knowledge on how to replace the outside door handle on the Chevy Express van.
Operating the remote or the key a few times and it fails means you have to stay out. Getting into your van is possible even through the back door if it opens.
Yet, the dignified way is to get in the car through the door and to reach home. It means to replace the door handle if required.