
Motorists, who drive their cars regularly, often face issues with the braking system of the car.
Having sufficient knowledge about how to get air out of brake lines without bleeding them can save you from serious trouble.
Issues and problems with the car are inevitable, but timely maintenance can get things back to normal condition.
If car brakes have started feeling soft, it is probably due to air in the brake lines. Bleeding the brake lines to get air out is the most common solution.
Either you can do this exercise in your own garage, or you can visit the nearest workshop for the solution.
Once the air is out of brake lines, and the fluid is up to the recommended level, the problem should disappear.
There is no need to panic about the whole process. We are going to talk about how to get the air out of brake lines without bleeding.
Table of Contents
How to Get Air Out of Brake Lines without Bleeding Them
Most of the problems with the cars need a little knowledge and you will be able to fix the issue in your own garage. If you want to know how to get the air out of brake lines without bleeding, this article is a must-read for you.
You can also get these issues resolved by a professional mechanic but we are going to save your time and money with the DIY guide.
However, you just need to follow these simple steps to get the air out of brake lines and get the brakes back to their original condition.
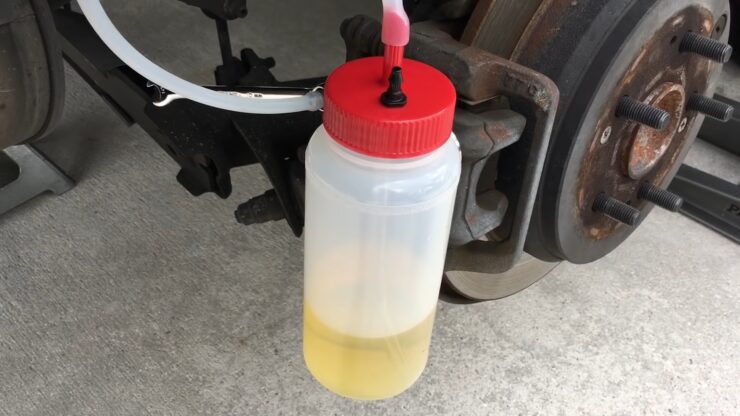
Step 1: Place the Plastic Tube
In the beginning, you need to arrange a flexible plastic tube of almost 18 inches and attach it to the first bleeder’s nipple.
You can access the bleeder from the backside of the brakes.
Therefore, it can be used in any container or a simple plastic bottle to store the fluid. In establishing the connection, make sure there is no leakage and repeat the same process for all bleeders.
Fix the tube to the nipple in such a manner that the tube does not come off.
Step 2: Store the Used Brake Fluid
Once you have collected the brake fluid from all the bleeders, store the brake fluid, and recycle it with care.
While performing any kind of maintenance work with the car, make sure to wear safety goggles and make sure that fluid does not get in contact with the eyes or hands.
Wearing gloves is also a good practice.
Step 3: Refill the New Brake Fluid
The old brake fluid has lost its efficiency and you need to get rid of air in brake lines.
While refilling the braking system with the new fluid, only stick to the company’s recommendation about the fluid formula. If you are not confident which brake fluid is more suitable for your car, try reading the user manual.
Any expert mechanic can also suggest a suitable brake fluid for your car.
Start pouring the new brake fluid in the main cylinder and pour slowly so no air remains trapped in the brake lines of the air-tight fluid reservoirs.
You need to perform the exact procedure for the other tires. Make sure you don’t spill brake fluid in the process as not filling the cylinder up to the right level will not resolve the issue.
Also, read the instruction about the right level of brake fluid for your car.
Step 4: Follow the Guidelines
Before getting air out of the brake lines, make sure that the transmission is off and everything is in the right state.
The cylinder should be full with the brake fluid.
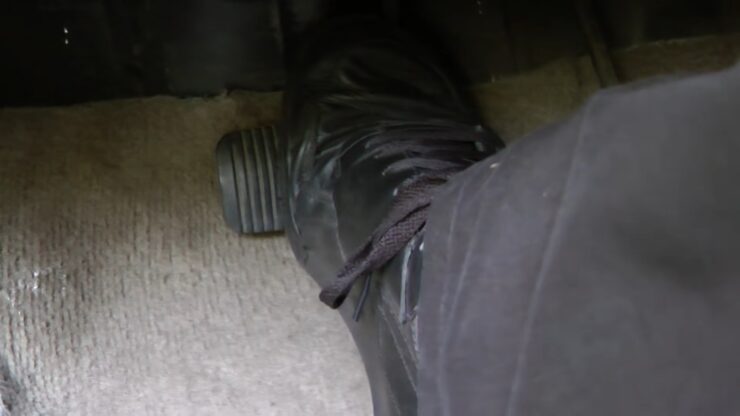
During the bleeding process, try pressing the brake pedal 8-10 times and hold the brake pedal for complete bleeding.
Following all safety protocols will not only get you the best results but you will also not compromise on your own safety.
Step 5: Final Round
After step 4, cut the bleeder and let the brake fluid flow a little bit. Now, start pressing the brake pedals slowly and let the brake fluid flow 2-3 times.
Once every last packet of the air in brake lines is out, refill the cylinder to the top. Apply the same process with other tires.
It is critical to notice that the master cylinder should not have any air trapped inside and the cap should be tightly closed.
Go for a test drive and you should feel the clear difference in the performance of the braking system.
Step 6: Things to Consider
Some people don’t get the desired results and still end up with air in brake lines even after following the following process.
If the screw is not perfectly closing the bleeder, replace it immediately. Once you have removed the screw, put your finger on the outlet.
Let the fluid flow out of the bleeder until it touches your finger. Now, slowly start installing the screw so there is no air in brake lines.
Required Tools for the Process
If you are planning on doing this entire one on your own, some necessary tools must be arranged.
The process is easy and can be performed with the available resources.
However, all you need to do is to arrange the new brake fluid as per the company recommendation and arrange the given tools for the procedure:
- A flexible plastic pipe to bleed the brake fluid
- Container or the storage bottle for the used brake fluid
- Wrench to hold the tube on the nipple of the bleeder
- Some new screws to replace the worn-out screws
A small vacuum pump can be used if you want complete bleeding though it is not necessary. If you have your friend to help you with the whole process, the job will be easier and will take less time.
Even if some other tools are required, you won’t have to leave your garage in most cases. Everything required to get the air out of brake lines can be easily found in a typical garage.
What Does It Mean By Air In Brake Line
Once you have felt that car brakes are not firm and the pedal is feeling spongy, the issue is more probably due to air in brake lines.
Whenever you have pressed the pedal, the car will start moving slowly, and the brake pedal will start going to the floor.
Most of the daily commuter cars have a hydraulic braking system where brake fluid builds pressure. Over time, brake fluid levels start decreasing slowly.
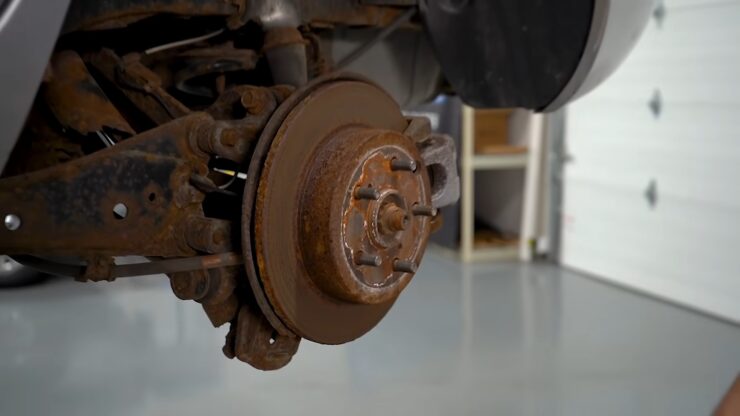
As the brake pads in the braking system of your car start wearing out, the brake pedal has to cover more distance to come in contact with the rotors.
The variation in the distance may be extremely small, but it impacts a lot as four of the pads collectively make a major difference.
With the passage of time, your car braking system needs more fluid.
How does the air get in the sealed brake fluid containers? As you open the cap of the brake fluid container, some air gets trapped in the pipe.
If the fluid level is up to the mark, there are no chances of getting any air trapped inside the container but it happens with the lower brake fluid levels.
The air packets travel to the brake lines and impact the brake performance. When this whole scenario takes place, we refer to it as air in brake lines.
The air in Brake Lines Symptoms
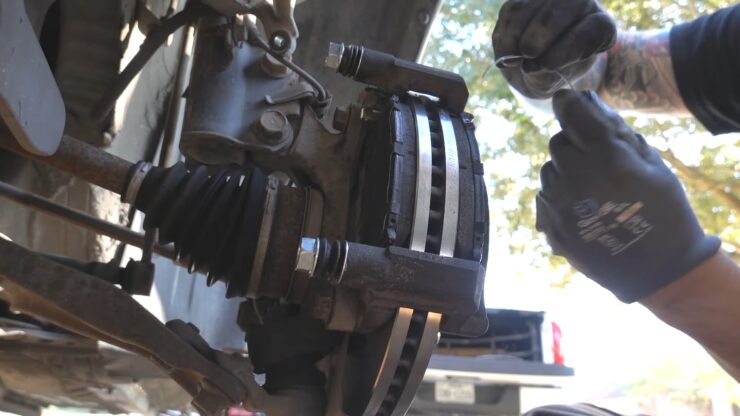
Any experienced driver will easily detect the issue of air in brake lines. When your apply force on the brake, the brake fluid applies force to the brake calipers.
As there is air in the brake lines, the brake will stop the car slowly or the brake grip will start losing with some time. Poor brake performance or the spongy brake pedals are the clear symptoms of air in brake lines.
Here are some other common symptoms that require you to know more about how to get the air out of brake lines without bleeding.
1. Brakes Feel Spongy
A spongy brake pedal clearly indicates that you need to consider doing some DIY or visit the nearest mechanic.
As you press the brake, the brake pads don’t firmly grip the rotors.
As it happens, either the brake will start losing its grip, or the car will stop slowly. In both cases, the car braking system is not offering performance in an efficient way.
The spongy brake pedals are caused by the air pockets that are trapped in the brake lines.
Instead of brake fluid, the air packets come in contact with the rotors and the driver will experience a spongy brake pedal.
2. Irritating Sound while Applying Brakes
When the car is in a running state, you may not notice the sound but you will hear it while traveling on steeper paths where you have to apply brakes more often.
The air will resist the connection of fluid with the rotors and the brake pads will generate an irritating sound when you apply brakes.
3. Brakes Feel Soft
When everything in the braking system is in perfect condition, the car should come to a stop after applying a little pressure on the brake pedals.
As the brakes start feeling too soft or lose the original point of impact, this is more probably due to air in brake lines.
Just like spongy brakes, softer brakes are another major symptom of air in brake lines. As the brake fluid does not get to apply pressure on the rotors due to air pockets, the air is compressed more easily than the fluid.
With no air in brake lines, the brakes will feel more rigid and will require less force to stop on the brake pedals to stop the car.
4. Brake Pedal Depressed to the Floor
As the fluid level is low due to worn-out brake pads and air in brake lines, the distance between the rotors and the brake pads has increased.
Over time, the distance will start increasing until there is no other option left except getting air out of brake lines.
5. Poor Brake Performance
All of the air in brake lines symptoms will eventually lead to poor brake performance.
You might consider changing the brake pads but if you have recently changed the brake pads then the performance is definitely affected by air in brake lines.
How To Get Air Out Of Brake Lines Without Bleeding: Live Project
Conclusion
The reason behind the air getting trapped in the brake lines may be different the process will be the same to get the air out.
In most of the cases where drivers face issues with the brake performance, brakes don’t require a complete overhaul. Therefore, learning how to get air out of brake lines without bleeding is a must-need DIY.
Continued use of worn-out brake pads and the spongy brake pedal is not only a dangerous situation for yourself but you are also risking the lives of other drivers.
As soon as you have detected any symptoms of air in brake lines, make sure to follow the procedure.
Using contaminated brake fluid will cause the brake pads to heat up sooner and you will experience a lag in the brake application. The process of getting air out of brake lines without bleeding is pretty simple.
We have tried to explain every little detail that you need to know about how to get the air out of brake lines without bleeding. If there is something that is not crystal clear, make sure to leave your query in the comment box.
This simple process of getting air out of brake lines works for most users. If you face any complications, please consider seeking professional help.
Drive safe and pay special attention to the performance of the braking system.
Read more about: How to Change Brake Pads and Rotors on a Chevy Silverado