It’s hard to find a vehicle owner who never faces the stripped lug nut issues. Therefore, how to remove a stripped lug nut must be beneficial and helps to enrich your skill.
Above all, you are in the right place; here we show you the best and several easy methods to remove a stripped nut, so let’s start.
Most screws and nuts are hex, but most wrenches and other adjusting tools are not.
Wrenches and pliers tend to slip, especially when loosening very tight nuts. The result is that the nut becomes worn or rounded.
Once this process is started, it Freusually only gets worse because wrenches and pliers no longer fit properly and slide more easily.
Few things are more frustrating than removing stripped hardware.
When the flat edges of a hex nut have typically become rounded, conventional tools – made contact with the angular shape – are no longer effective in loosening the nut.
Fortunately, this is far from an unusual topic, and there are several techniques to fix this problem.
Without any further ado, let us quickly start the top 3 methods to remove a stripped lug nut.
Table of Contents
How to Remove a Stripped Lug Nut: 3 Easy Methods
Method 1: Basic Method
Removing a lug nut is one of the most common tasks for a handyman.
Despite a well-filled toolbox, sometimes the equipment is not suited to the job at hand.
To be able to easily extract the bolts when disassembling furniture, repairing a car, or dismantling an appliance, it is advisable to follow the following tips.
Step 1:Unscrew a nut with wrenches
If the wrench is larger than the bolt:
- Position the open-ended wrench
- Insert a coin between the nut and the key
- Turn to unscrew
If the wrench is smaller than the bolt
- Obtain a large screw with a fairly large flat head;
- Screw-in a bolt of similar width;
- Place the head of the screw on the nut to be removed and tighten the other bolt;
- Turn to unscrew.
- Unlock a rusty nut
Over time, the nuts can rust. Then, it becomes tough to eliminate it without forcing them.
Step 2: An Effective Technique to Unblock a Rusty Nut Without Breaking It
- Loosen the nut as far as possible with an open-end wrench.
- If possible, it is best to clamp the part with the rusty nut in a vise.
- Now, you need to wedge the nut in the jaw of an adjustable wrench.
- Spray a strong lubricant like WD-40 on the stuck nut. A little ammonia, soda, or white vinegar can replace this product. It must soak up inside the thread and will eat away the rust. If necessary, remove the excess around it with a clean cloth.
- Leave to act for 10 minutes.
- Apply strong pressure to the bolt with the adjustable wrench.
- If necessary, hit the nut with a sledgehammer to weaken the pieces that block it.
Step 3: Remove a Stuck Nut by Heating It
Even after several attempts, the blocked nut does not want to leave its nest?
Do-it-yourselfers who often find themselves faced with this situation do not hesitate to take out their torch or blow-torch.
The lug nut will not melt, it will only become more malleable, and the elements that block it will be altered. With this technique, the nut is released in a few minutes:
- Put on protective gloves.
- Bring the blocked nut to red with the torch or the blow torch.
- Loosen the nut with an insulated handle multi-grip pliers.
- Saw off the blocked nut
As a last resort, it is always possible to saw the bolt with a hacksaw.
You have to saw off two opposite sides of the nut and hit them with a hammer or sledgehammer to separate it from the screw.
No matter how useful they are, there will inevitably come a time when they come face to face with a stripped lug bolt that is almost impossible to remove.
There is no need to panic. Most stripped lug nuts, whether on a car, on a bike, or a skateboard, can be easily removed.
All you require is the right tools and patience.
Doing this work at home will save you the inconvenience and cost of taking your project to a mechanic.
Instructions
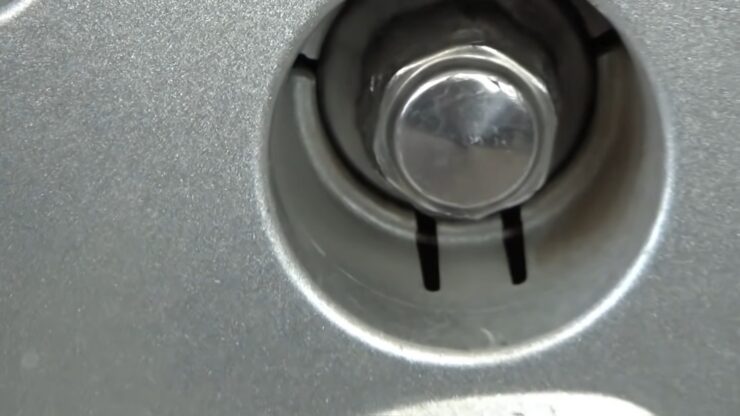
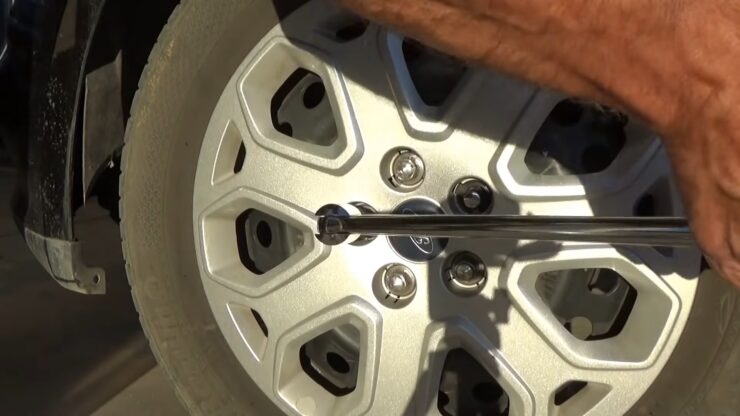
- Take a hex driver slightly larger than the head of the bolt you are trying to remove.
Put the controller on the head of the pesky bolt.
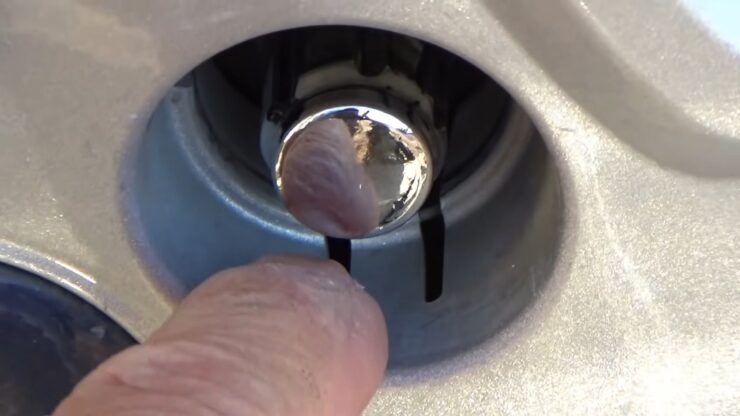
Rotate the controller and try to loosen the bolt. Sometimes by allowing additional room, you can slide the bolt out even though it is stripped.
- Use a rotating tool and cut off the wheel to make a notch in the bolt head.
Make sure it is deep enough to insert a screwdriver blade. Inject a flat screwdriver in the slot. Turn the screwdriver and try to “loosen” the bolt.
If it doesn’t work, continue to step 3.
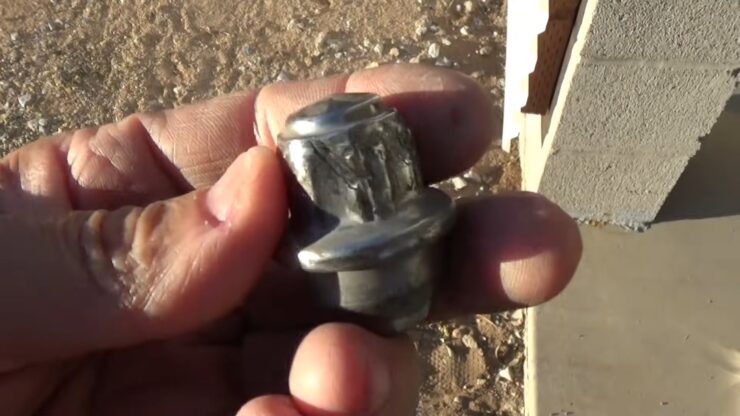
- Take the cutting wheel and rotary tool and cut the bolt head.
Leave enough yarn to be grasped by a couple of vice grips. The top of the “screw” is now the head of the bolt. Try to extract the bolt with the vice grips.
- Drill in the bolt’s center with a small-sized drill bit to fit the head. Use a similar size bit like the screw extractor.
Press the screw extractor into the hole you have drilled.
Be gentle and do not force the puller onto the screw as it could break. Turn the puller counterclockwise and work the bolt out.
How to Remove a Stripped Lug Nut-Method 2: Using Lubricants and Heat
It is quite a challenge to loosen a stripped lug nut.
You don’t give importance to it until the day comes when one or more of one resists you. This will help you with your repairs.
When it comes to a nut and bolt that we can replace with new ones, it may not be a headache but, what if you have to take advantage of the bolt or bolt?
If the previous method doesn’t work, you can try this method.
Using Lubricants
Well, this is the best known to most, but not always the most effective.
It usually works for light occasions, to call it somehow. When not too much time has passed and the cold welding between the two materials has not reached its total union.
In these cases, applying lubricating oils, the so-called loosening devices can work.
If you are looking for this product, you can find it on the Amazon page. They usually come in aerosol cans; it involves putting a generous jet of oil at the union of the nut with the screw.
Let it do its action for at least ten minutes for said oil to penetrate between the union of both materials.
Then, it is convenient to put the appropriate wrench on the nut and give the wrench a few hits to help loosen the corrosion.
By Heating
This method is the most effective and comfortable in turn. The problem is that it cannot always be applied due to different inconveniences:
- That the area where the nut is located does not allow this technique due to the danger of fire or other damages.
- Not everyone has a torch available.
It is about applying heat to the union of the nut with the screw or bolt until it takes on a reddish cherry color.
Be careful not to melt the materials. Once this heat has been reached in said nut and bolt, you must immediately cool with plenty of water so that the materials contract.
Applying heat will make the existing corrosion between the nut and bolt disappear, being free of the cold welding that joined them.
Also, in this case, it is convenient to put the appropriate wrench on the nut and hit the wrench in the direction of loosening the nut (anti-clockwise).
It is a method that rarely fails; it does not matter if the nut has not loosened for forty years.
The effect of heat decomposes the internal corrosion between nut and bolt. The problem is that you cannot always heat the area due to other inconveniences.
Mechanically
We believe this is the least known way to loosen a rusty nut.
We suppose that for different commercial interests so that in the end you go to a professional. This is a trick that a marine mechanic taught me many years ago. He never did it in front of people, and he waited to be alone and apply it.
It is time for more people to get to know him since I consider it a chore not to be able to loosen a nut.
For the technique, you only need a sharp chisel or chisel, and if it is new, the better. And a powerful hammer that allows you to hit the chillers well.
It is about putting the chipper on one of the flat faces of the nut in a transverse direction as if you wanted to cut the nut in half.
Once you have placed the chisel in the center of the nut (because it is the weakest area), you have to give a few blows as if you were trying to split the nut.
It is not necessary to split it, but if you make a good slit in the face of said nut.
With this, it is achieved that the nut will have a few microns in its diameter and loosen due to the blows received. These microns will be enough for the nut to turn and loosen.
If you see that the first time you don’t get it, it’s just a matter of making the slit bigger again until you get it.
This technique is very practical, plus anyone has a chipper and a hammer. It is just as effective as the heat, but in this case, you don’t need a torch. We insist that it is very important that the chisel is very well sharpened.
Using a Locknut Removal Kit
Use a locknut removal kit if you can’t wait for a new key from the manufacturer.
Kits contain several sockets designed to remove most locknuts. Determine and attach the appropriate size socket for your lug nuts to a regular ratchet and place it over the jam nut.
Turn the lug nut counterclockwise until it comes off. This can strip the nut, so have an extra set of lug nuts on hand.
Locknuts are not designed for use with an air impact wrench, so remove the locknuts with the socket and ratchet.
If you do not have access to a jam nut removal kit, remove the nut with locking pliers.
Tighten a pair of locking pliers around the lock nut. Turn the vise handles counterclockwise to loosen the lug nut.
Use a hammer to strike the vise handles counterclockwise if the nut is difficult to turn by hand.
Turn the lug nut until it can be removed by hand. It may be necessary to re-tighten the vise claws several times, as the nut may strip.
Take your car to a mechanic’s shop if you can’t complete the previous steps.
Most mechanics have tools to remove locknuts and alter them with normal lug nuts.
How to Remove a Stripped Lug Nut- Method 3: Using an extractor
Unfortunately, it happens that when you want to loosen a screw or a seized nut (or conversely by tightening too hard), these parts break.
In this case, to extract the remaining screwed part, it is often necessary to remove the part or element that was to be assembled.
Several cases can then arise:
This is the simplest case since you will be able to:
- Either make a universal line in the metal “stump” to unscrew it with a strong screwdriver
- Either loosen the piece of the stud with tightly tightened locking pliers
The stud is broken flush:
- Using a small, well-sharpened chisel, make slight bleeding on the diameter of the screw to be extracted.
- Take special care in this operation; do not slip because you would risk cutting into the metal around the stud (clumsiness, which would have the consequence of “braking” the part to be extracted.
- Then, use a screwdriver for unscrewing
- If the first attempt is unsuccessful, you will need to drill to extract the stud.
Using an Extractor
The most common solution is to make a hole to accommodate a “pigtail” type extractor:
- Using a sharp punch, firmly mark the center of the stud
- Use a drill bit about 2/3 of the diameter of the stud to be drilled
- Drill vertically
- Remove all metal shavings and choose the extractor (pigtail) corresponding to the drilled hole
“American” extractors are presented in a casing, including:
- a special drill set, different diameters
- a guide set to hold the drill bit while drilling
- a set of extractors
- a set of 6-point sleeves (nut) for the fork wrench socket
Impact Screwdriver
- The technique of use is as follows:
- after choosing the diameter of the drill corresponding to the stud, drill it
- insert the corresponding extractor fully using a hammer
- slide the sleeve (nut) on the extractor and loosen the assembly
- choose a drill with a diameter smaller both than that of the stud and that of the extractor
- Extraction without an extractor
If you do not have an extractor, the operation is more delicate but not impossible.
You will need to drill with a larger bit so that it removes the “core” of the stud, leaving only the threads. It is then possible to extract what remains in the thread.
This operation is quite meticulous, its success depending on the precision with which you will have “pointed” at the center of the stud.
It is often necessary, after this operation, to pass a tap to remake the thread.
Using WD-40
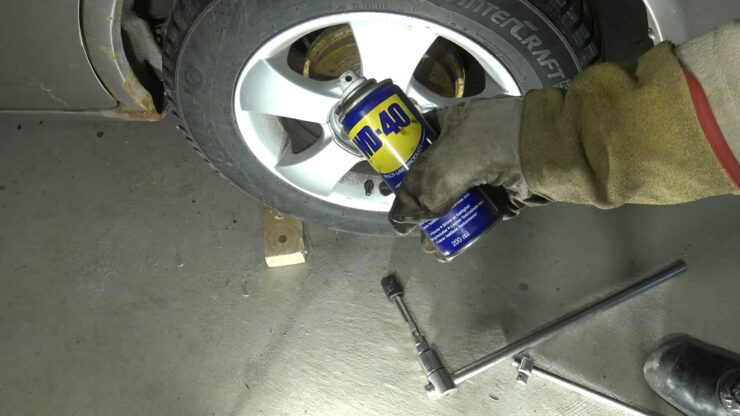
The oiling fluid is indispensable simply in the conditions where you require unscrew bolts with shabby edges.
You first need to spray in the tiny space between the material and the screw. The emollient will be reduced its friction force, which is effortless to reach.
When there is no method that will work, you need to drill that screw.
You can start from scratch, or also you can start it halfway and again screw it in that extractor and eliminate the bolts.
Conclusion
We constantly find screws because of the quality in which its edges break.
Now, too, a high-quality tool can rarely be found because the issue becomes doubly many times relevant. We are sure, after reading this guide, you have proper knowledge on how to remove a stripped lug nut?
In order to work with the mechanisms, in addition to all types of repair and construction wisdom.
It is related to repeated unscrewing and twisting of several bolts, nuts, and similar products. It seems that it is quite difficult.
However, many times in that method of carrying out repairs, reconstructions, and auto modifications, same like any other equipment repair, it cracks out that some screws or nuts were pulled off its edges a long time ago and now it is quite difficult.
If not terrible, unscrew them using the normal methods.
Check our recent activity How to Make Low Beams Stay on with High Beams Silverado